Loupe guide · Magnification & selection
2.5×, 3.5× or 4.5×:
Which loupe magnification is right for my work?
The right magnification depends on which details you need to see, how much of the surrounding area you need in view and the position in which you work. This guide helps you narrow your choices for everyday clinical practice.
When choosing loupes, the first question is often a number: is 2.5× enough? Should you go straight to 3.5×? Or is 4.5× magnification worthwhile?
An informed decision starts with your daily work. Which structures would you like to examine more closely? How much of the surrounding working area would you like to see at the same time? And which optics can be tailored to your working distance and vision?
Dentists, dental prophylaxis assistants (ZMPs) and dental hygienists may have different requirements. Even for the same clinical task, experience, vision and preferred working position vary.
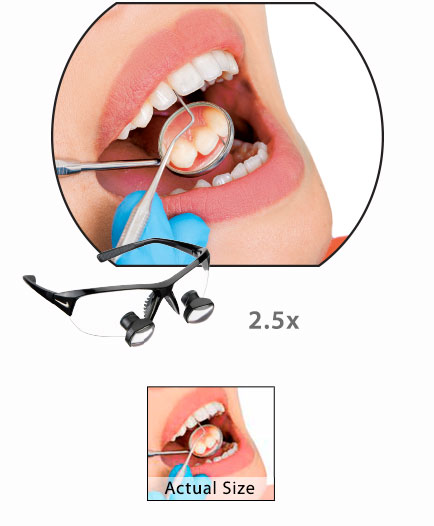
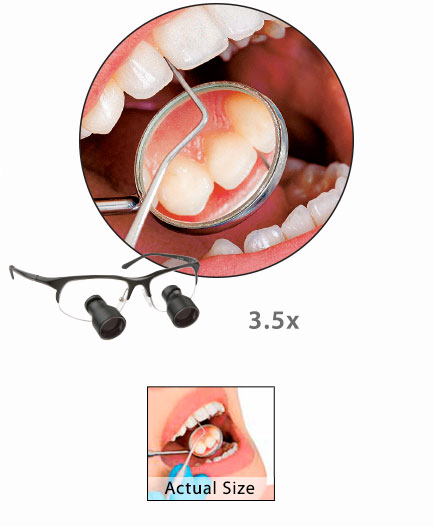
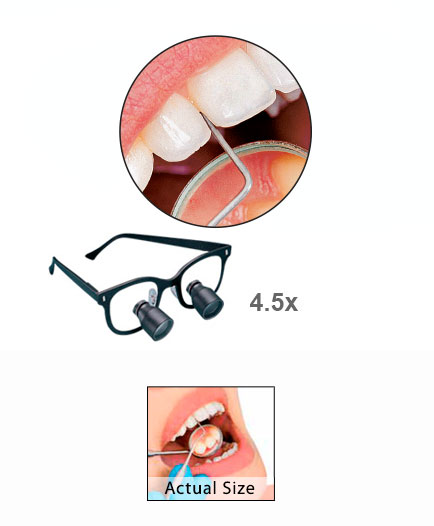
Magnification in a direct image comparison
2.5×
DFV · Standard Field
3.5×
DFV · Standard Field
4.5×
DFV · Standard Field
Start with your most frequent clinical task
Before comparing, consider which tasks you want additional magnification to help you perform.
Would you like to see several areas at once during examination or instrumentation? Are you looking for a larger view of small structures during restorative procedures? Or are you seeking additional support for selected tasks in which your current loupes reach their limits?
Note two or three specific situations. These provide a better basis for a trial than simply asking for the highest magnification level.
The following table offers practical guidance for comparison. It does not prescribe a particular magnification level for any specialty.
| Magnification | When a trial may be useful | What to pay particular attention to |
|---|---|---|
| 2.5× | When to try it?As a starting point if you are choosing loupes for the first time or want to understand your requirements for detail visibility and a view of the surrounding area. | What to look for?Are the structures important to your work sufficiently large and clearly visible? |
| 3.5× | When to try it?If you would like a larger image than 2.5× while keeping enough of the surrounding area in view. | What to look for?Compare different optical designs for field of view, image quality and room to move while maintaining focus. |
| 4.5× | When to try it?If you need an even larger image for selected clinical steps. | What to look for?Check whether field of view, depth of field, lighting and custom fitting support the way you work. |
A direct comparison may also show that a lower level already meets your requirements. What matters is the view you actually need for your tasks.
Consider magnification and field of view together
The field of view describes the area you can see through the loupe optics at one time. It affects how much of the surrounding area remains visible alongside the detail being viewed.
Within comparable optical systems, higher magnification may be accompanied by a smaller field of view. However, the optical design also plays a significant role. The field of view of loupes therefore cannot be deduced from the magnification figure alone. Optical fundamentals from Designs for Vision, pp. 8–9.
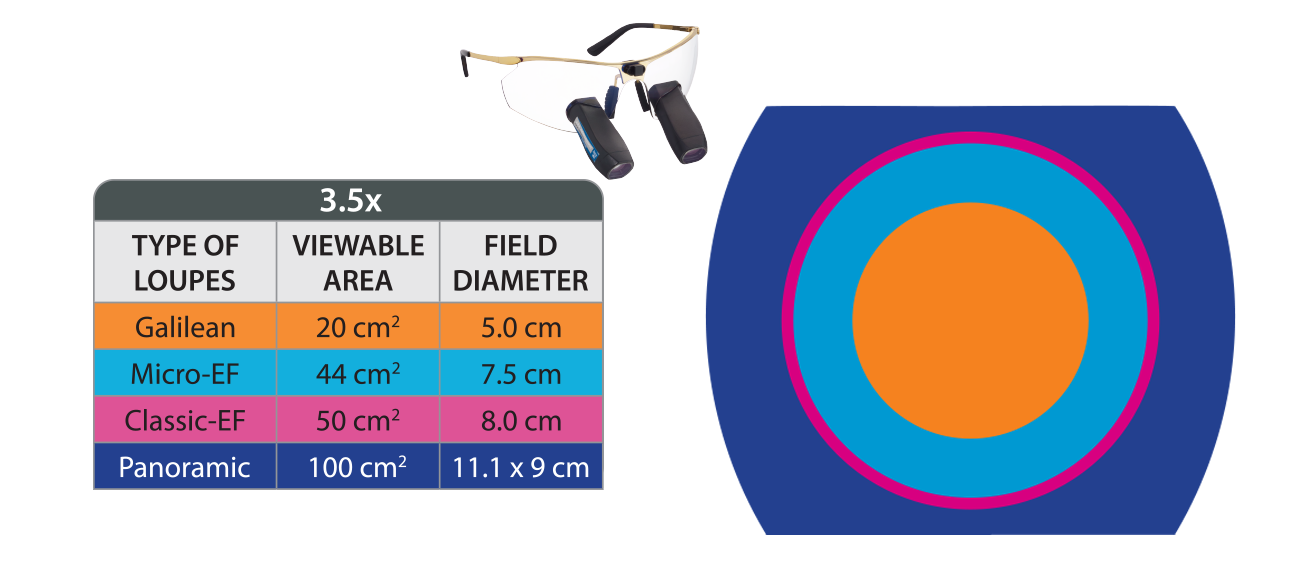
The Designs for Vision product range also illustrates this: Standard Field, Expanded Field and Panoramic optics are offered with different fields of view at the same 3.5× magnification. The manufacturer's brochure illustrates these differences. The reference values it provides do not replace assessment of your individual configuration. Manufacturer brochure “Dental Magnification”, pp. 3–5.
3.5× magnification. Four different fields of view.
Open the original graphic at full size ↗
How to read the original graphic
“Viewable area” means the visible area, while “Field diameter” refers to the diameter of the circular fields of view. The Panoramic measurement of 11.1 × 9 cm instead describes width × height.
- Galilean · Standard Field
- Ø 5.0 cm
Viewable area: 20 cm² - Micro-EF
- Ø 7.5 cm
Viewable area: 44 cm² - Classic-EF
- Ø 8.0 cm
Viewable area: 50 cm² - Panoramic
- 11.1 × 9 cm · Width × height
Viewable area: 100 cm²
Manufacturer specifications at 3.5×. The original graphic does not state a common working distance. These are manufacturer reference values for the configurations shown, not guaranteed field-of-view dimensions for your custom-fitted loupes.
It is therefore worth asking a specific question when choosing: Can I see the required detail sufficiently enlarged while also seeing enough of the surrounding area for this clinical step?
Depth of field: how much movement remains in focus?
The depth of field describes the distance range within which the object being viewed appears sufficiently sharp. It matters when your head, your instruments or the patient's position change during your work.
All other conditions being equal, depth of field typically decreases as magnification increases. However, the depth of field you can actually use depends on the entire system and the viewing conditions. Manufacturer explanation of depth of field, p. 7.
During the demonstration, therefore, also try small movements forward and backward. Does the detail that matters to you remain sufficiently sharp? Do you have to adjust your position frequently? A brief look at a stationary test object only partly answers these questions.
Your vision matters when choosing loupes
Two people may see differently through the same loupes.
A study involving 40 dentists showed marked individual differences in near visual acuity under simulated clinical conditions. Age and the optical aids used also influenced the results. The study examined visual performance on a phantom head; it does not provide a general recommendation for a particular magnification level. Eichenberger et al., 2013.
Existing prescription correction, working distance and optical alignment should therefore be discussed together. When comparing, check whether you obtain a clear image in your intended working position.
Lighting is also part of the comparison. Where possible, assess different loupes on the same test object and under comparable lighting conditions.
What does magnification tell you about the quality of your work?
A larger image can help you see fine structures. Its effect on a clinical step also depends on the task, experience and working conditions.
A randomized study involving dental students illustrates this: 2.5× magnification improved the accuracy of the two-dimensional preparation task studied among students with good baseline visual acuity. No significant effect was found for complex three-dimensional preparations. The study examined exercises on acrylic blocks, not patient treatment outcomes. Eggmann et al., 2022.
For your selection, this means assessing the optics against the tasks you want to perform with them. The magnification figure is an important selection criterion within the overall system.
Five questions for your hands-on trial
- Which details do I want to see?
Choose a suitable test object that reflects your requirements as closely as possible.
- How much of an overview do I need?
Check whether enough of the surrounding area remains visible alongside the detail.
- Does the focus suit my working position?
Compare the optics at your intended working distance and with the prescription correction you need.
- How much movement is possible while the image stays sharp?
Try small changes in position and assess the usable depth of field.
- How does the complete system feel?
Consider fit, weight distribution, lighting and instrument handling.
If you already use loupes, bring them to your consultation. This lets us discuss specifically what you want to keep and what you would like to improve with your next pair of loupes.
Find the magnification that suits you
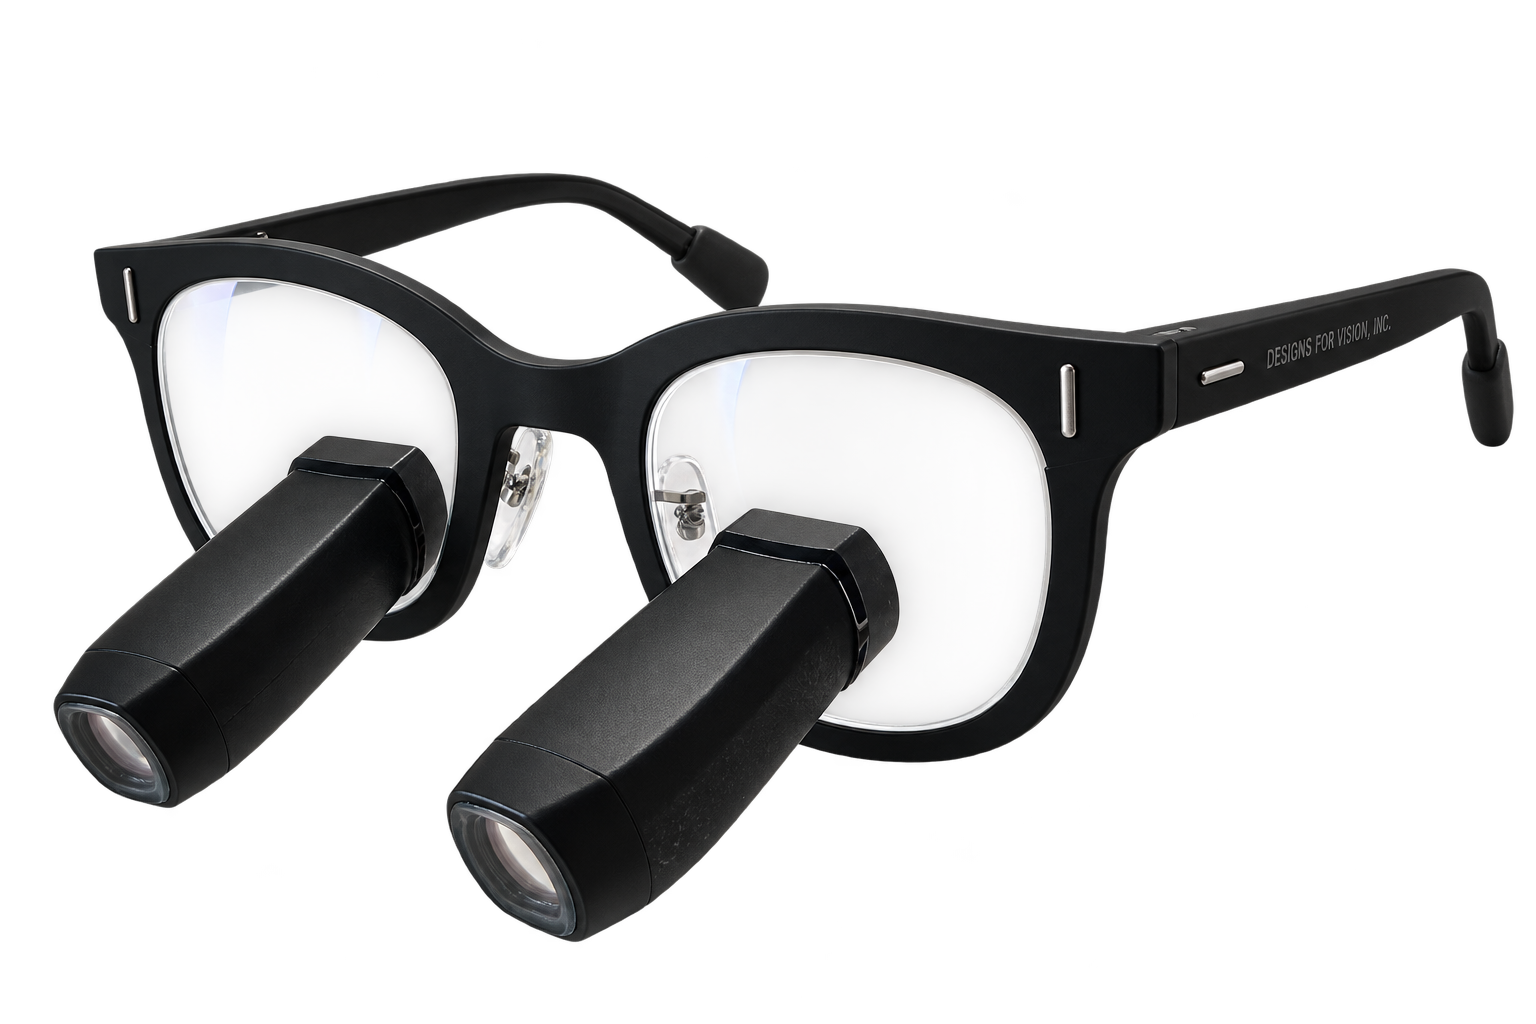
At Visiomedical, we begin with your tasks, your previous experience with loupes and your preferred working position. Together, we discuss suitable loupe optics from Designs for Vision, taking into account magnification, field of view, working distance, declination angle and, where applicable, prescription correction.
You can outline your needs in advance using the Loupe finder. We will work with you personally to finalize the configuration.
Request a consultation & measurementsFree, no-obligation initial consultation at Visiomedical.